Friday, December 21, 2007

Icebox Cookie Variations

icebox cookie dough

After reading “a slice-and-bake cookie palette” at http://www.smittenkitchen.com/ today, I was inspired to try my own variations of her already fantastic recipe. I decided to go with a lemon pepper version and a toasted coconut, cherry version.

Version One
Lemon Pepper Icebox Cookies
lemmon pepper icebox cookie dough

1 teaspoon ground black pepper
Zest from one lemon

Follow the directions for “Slice-and-Bake Cookie” dough located here, add the black pepper and lemon zest to the dough and incorporate thoroughly. Roll the dough into a log, wrap in plastic wrap Roll the dough into a log, wrap in plastic wrap or wax paper and freeze for 30-45 minutes (I found that the dough was easier to work with after 45 minutes).

Remove the dough from the freezer, unwrap it and cut it into ¼ inch rounds. Bake for 12 minutes at 350 degrees.

lemmon pepper icebox cookie

My thoughts:
Meh, they were kind of bland.

Version Two
cherries and coconut

Dried Cherry and Toasted Coconut Icebox Cookies
¼ cup dried cherries – finely chopped
¼ cup toasted coconut

Basically the same instructions as above but this time after making the cookie dough, incorporate the cherries and toasted coconut.
toasted coconut, cherry icebox cookies

My thoughts:
This version was definitely the way to go! Dried Cherry and Toasted Coconut Icebox Cookies are a five-berry keeper.
berry ranking scale -- 5 berries!

Tuesday, December 18, 2007

Recipe Review Special

Part Two
Here is part two of my recipe review special featuring Food Network's “Twelve Days of Cookies”.

Moravian Spice Wafers
From Food Network Kitchens
morovian spice cookie

The recipe is located here and it really is quite the recipe. Cinnamon, ginger, cloves, white pepper, mustard, molasses…. They really aren’t messing around with the ingredients list.

I love spice cookies and was really excited to try this recipe. It didn’t really disappoint me but it was kind of a pain. Rolling the dough to 1/16th of an inch, freezing the dough, using a cookie cutter, freezing again… come on.

Though the prep work involved did try my patience, the cookies reminded me a lot of pepparkakors, which I’m a big fan of. Overall, I would give this recipe a very respectable 3 out of 5 berries.
berry ranking scale -- 3 berries
morovian spice cookies

Alternative:
Like I mentioned above, I thought the effort necessary to make these cookies wasn’t really justified by the final product. For my second and subsequent batches, I used a different method, which basically involved making drop cookies that were rolled in sugar and spice.

Method:
Create a sugar and spice mixture consisting of ½ cup sugar and 1 teaspoon of apple pie spice. Roll rounded teaspoons of the batter in the sugar mix and place on the baking sheet about an inch and a half apart. Press down on each dough ball with the back of a fork, vertically and horizontally, creating a criss-cross pattern on each cookie.
morovian spice cookie my version

Bake for 10-12 minutes, sprinkle with a little more of the sugar mixture, allow to cool to room temperature and ENJOY! My version of these cookies got rave reviews.
spice cookies

What people are saying about Blackberry Pockets’ Moravian Spice Cookies:
“Best cookies ever”
“I just EVOO’d in my pants!”
“What is that? Freaking spice?”

With acclaim like that, these cookies get bumped up to a 4-berry ranking!

berry ranking scale -- 4 berries

Saturday, December 15, 2007

A Blackberry Pockets Special

Recipe Review
berry ranking scale -- 5 berries!

Welcome to a special recipe review edition of Blackberry Pockets. These recipes are part of the Food Network’s “Twelve Days of Cookies”, an annual newsletter they publish that provides exclusive holiday cookie recipes, and will be ranked using my newly developed Five Berry Scale!

The Twelve Days of Cookies contains, appropriately, twelve cookie recipes plus one bonus but unfortunately, I only had time to test two. I did initially plan to blog the entire series but as it turns out, the holiday season has not left me with much free time for writing (I really need to start bringing the laptop to the bar…). In any case, the recipe under evaluation today is Almond Lace Cookies (Florentines) from The Food Network Kitchens.

*In order to properly judge these recipes, I made sure to adhere strictly to the recipe and also made three simple judging criteria, which are the following:

Accessibility: Does the recipe consist of ingredients that can be found at an average grocery store (for reasonable prices)?

Pay off: Is the resulting quality of the cookies worth the necessary effort required to make them?

Taste: Obviously the most important criterion and the one that carries the most weight in the decision making process — do the cookies taste good?

PART ONE
Almond Lace Cookies (Florentines)

almond lace cookies

My thoughts:
These cookies consisted of simple, easy to find ingredients that many people would usually have around the house, especially around the holiday baking season. The need to boil sugar and essentially make candy to use in the batter was, although not terribly difficult, kind of a pain. Ultimately, I found their taste to be a kind of bland and the texture to be somewhat gritty. I probably won’t make them again but they were very pretty and if you really like almonds, they are worth trying.
Overall rank: 3 out of 5
berry ranking scale -- 3 berries

*Note, I found the following sentence of the recipe to be somewhat confusing and thought I would clarify it for you in case you make the same mistake I did and burn your cookies:
“Bake 1 pan at a time, until the cookies are thin and an even golden brown color throughout, rotating pans halfway through baking time, about 10 to 11 minutes.”

The way the sentence is constructed, I took it to mean that halfway through the baking time was 10 to 11 minutes in. However, this was incorrect. 10 to 11 minutes is the total and MAXIMUM amount of time these cookies should be baked.

I took the liberty of rewriting that section. For clarity's sake:
Bake 1 pan at a time, about 10 to 11 minutes, until the cookies are thin and an even golden brown color throughout. Rotate the pans halfway through the baking time.

Tuesday, November 20, 2007

Cinnamon cashew brittle

cinnamon cashew brittle and silpat

Buttery peanut brittle: delicious, but still only the opening act of the holiday season. As a child, peanut brittle always seemed like the herald of the holiday candy. It was the first treat to start appearing around people’s houses and represented a promise of greater things to come. When the headliners (cinnamon rolls, cookies, FUDGE!) would finally arrive, the brittle would retire to a quiet corner to sell posters, tee shirts and homemade CDs, sought out by only the most loyal of fans.

In order to bring a little spotlight to this somewhat unremarkable confection, I’ve replaced the peanuts with cashews and added cinnamon, positioning my brittle into rock star status. This brittle isn’t content to simply warm up the crowd for the real show; it will blow the amp, steal your girlfriend and trash the hotel room!

Cinnamon Cashew Brittle is a great sweet to have around the house or to bring to parties and it’s the perfect recipe for the first time candy maker.

Recipe:
1/2 cup water
2 cups sugar
1/4 teaspoon cream of tartar
1 cup light corn syrup
1 teaspoon ground cinnamon
3 tablespoons unsalted butter – cut into ¼ inch pieces
2 cups roasted salted cashews
1 teaspoon baking soda

Combine the water, sugar, cream of tarter, and corn syrup into a large saucepot and attach a candy thermometer. Place the burner to medium-high and heat the contents until they reach a boil, stirring occasionally.

In another container, combine the cinnamon, butter, cashews, and baking soda.
cinnamon and butter

Now you just have to wait until the candy achieves a nice golden brown color at around 339 degrees F. This part takes a little patience; you don’t have to stir the pot; you only need to monitor it. Be wary, though. Although it takes a good 25-30 minutes to achieve the proper temperature, once it hits 300 degrees, it will start to rise rapidly. Don’t do something silly like go and watch Project Runway, even if it’s just for a minute, or you might end up with something like this:
ruined candy
Oh yeah, that's good and ruined.

In any case, if you keep an eye on the candy, you shouldn’t have any problems. While it is heating, you can prepare a cookie sheet either by greasing it or by lining it with a silpat.

When the candy achieves the appropriate color/temperature, remove it from the heat, mix in the cinnamon, cashews, butter, and baking soda and stir rapidly to combine. Then, poor the contents onto the cookie sheet and allow it to cool. When it is ready, you can break it into pieces and enjoy!

You know, In many ways, with its dichotomies of sweet/salty taste and smooth/crunchy texture, cinnamon brittle embodies the many flavors of the holiday spirit…or something. Its jagged edges will certainly cutchoo like a mall Santa if you disrespect it though!
cinnamon cashew brittle

Friday, November 2, 2007

Halloween Goodies

After receiving a thrilling and cinematic invitation to a friends annual Halloween fiestaval, my initial reaction was to respond with “what can I bring?”

No, I wasn’t (initially) concerned with costumes, dates or transportation but with what delicious goodies I could provide. I decided on chocolate covered candied orange peels, pumpkin scones, peanut butter brownies and homemade (well, sort of) raspberry infused vodka! Judging by their rapid and complete decimation, I’m thinking that they went over pretty well :)

candied orange peel
Recipe
http://blackberrypockets.blogspot.com/2007/07/chocolate-and-orange.html

butternut squash scones
Recipe from Joy of Baking
http://joyofbaking.com/PumpkinScones.html

peanut butter brownies
Recipe from Smitten Kitchen
http://smittenkitchen.com/2007/10/peanut-butter-brownies/

jug
Recipe to come!

Wednesday, October 24, 2007

That Autumn Flava

Butternut Squash Puree

squash and sage puree
Butternut squash has rapidly become one of my favorite ingredients. It’s sweet, nutty, autumnal flavor is crowd pleasing and seasonal during these fall months. My version of a simple butternut squash puree is the perfect way to liven up a tired menu.

Recipe
2 Cups diced butternut squash (about half a squash)
1 finely diced shallot
2 cloves of garlic—minced
2 tablespoons of extra virgin olive oil
1 cup chicken stock
½ teaspoon of salt
¼ teaspoon pepper
1 tablespoon fresh sage

butternut squash

Method
Peel and dice the butternut squash into ½ inch cubes. Add the two tablespoons of olive oil to a large sauté pan over medium high heat. Add the squash, shallot and garlic to the pan and sauté over medium heat for 5 minutes, stirring frequently, until the squash has caramelized on the edges. Season the squash with the salt and pepper during this period.

sautee squash food processor squash

Add the chicken stock and reduce the heat to below medium and allow the ingredients to simmer for 15-20 minutes until the squash is tender.

While the squash is simmering, finely chop the sage and set aside. When the squash has reached the desired tenderness, transfer the contents of the sauté pan to a food processor or blender, add the sage and blend to a puree. Add additional salt and pepper to taste, and enjoy!

This versatile puree has a variety of uses can be a filling for ravioli or lasagna, a topping for spaghetti/linguini/fettucini and makes a fantastic pizza sauce with grilled chicken breast and Munster cheese!

butternut squash pizza

Saturday, October 13, 2007

Pasta Roller Saga: Part Two

raviolis homemade

After much contemplation, vacant staring and a few calls to my parents for their expert opinions on the subject, I finally decided to transform my dough into bite-sized pockets of savory squash filled magic! I initially considered spaghetti, which is easy but seemed too pedestrian for my triumphant introduction to pasta fresca (I have since learned that homemade, fresh spaghetti—noodles in any form—are anything but pedestrian! They’re always transcendent and I can’t go back to dried.). Lasagna, on the other hand, would be distinguished but too much work. Butternut squash raviolis seemed to be the perfect way to properly utilize my noodles.

ravioli assembly
And they were, too! Slightly sweet, creamy, and pumkinny, butternut squash epitomizes the taste of autumn for me.

I made a puree of squash, caramelized onions, and fresh sage that was seasonal and delicious. Unfortunately, my raviolis were slighty doughy and I need to work on my assembly method. However, for a first try, they were still pretty darn good.

dough raviolis

Recipes are pending further experimentation for now but you can expect big things soon. For now, I will leave you with a final picture, employing the “dooce” vignette effect and a request for the perfect noodle dough recipe. I’ve tried using all-purpose flour, semolina flour, and a mix of the two but am still working out the kinks.


homemade raviolis with browned sage butter

Monday, October 1, 2007

Of Mysterious Packages and Pasta Fresca

I was greeted to a delightful surprise when I returned home from work last Wednesday.
mysterious package
Ooh, a mysterious package. What could it be?

revealed package

Hot damn! My blog has finally paid off. Two of my loyal readers took it upon themselves to help further my culinary education and sent me a very much-appreciated gift of a pasta roller! So much for Google AdWords, I’m just going to post my address and ask for presents!
pasta roller

I wasted no time in unwrapping, assembling and testing my newest gadget. I had been reading of this “pasta fresca” and was dying to make my own attempt. I found a traditional egg noodle recipe from the enclosed manual and began to work.
pasta dough well

mixing pasta dough well
Old school. For real

pasta dough ball

pasta fresca

I couldn’t believe it. Before me lay actual homemade pasta! It was not perfect by any means, but for a first attempt, it ranked fair. And at the time, to me, it was glorious. Unfortunately, upon completing my task I was left with one fateful question… What next?

To be continued.

Thursday, September 20, 2007

Homemade Granola Bars

Soft, Chewy and Delicious… For the Hippie in All of Us!
granola bar stack

My love for this high-energy food was initially kindled during my high school years when my appetite was bottomless but my wallet, alas, it was empty. As a lazy, job-less teen with a growing boy’s hunger, I had to get creative with my lunchtime choices and my midday meal would almost always culminate with 5 or 6 delicious chewy granola bars!

Granola bars were also a staple source of nourishment throughout college, and even now, they remain my favorite snack (barring any ten-pound bars of chocolate that cross my path). If I’m in a pinch (traveling, working late, out of propane for the grill), granola bars are even a reasonable dinner replacement item.

My dad introduced me to his version of a granola bar a few years ago and I was immediately hooked. His bars were wholesome, filling, perfectly sweetened and perfectly delicious. Although I used to identify granola bars with shiny containers, uniform sizes and (more often than not) a chocolate coating, after being exposed to the homemade variety, I just can’t eat any other kind.

The next time you take a trip, play a sport or just want a tasty, satisfying snack, try homemade granola bars. They are easy to make, easier to eat, and with all the great ingredients, they have got to be reasonably healthful.

Dad’s Granola Bars

2 cups of quick cooking oats
¼ cup raisins
¼ cup golden raisins
¼ cup sunflower seeds
½ cup mashed banana (about 1.5-2 large banans)
2 egg whites
¼ cup brown sugar
¼ cup honey
¼ teaspoon salt
1/4 teaspoon cinnamon
1 teaspoon vanilla

granola mix

Method
This might actually be the easiest recipe I know. Begin by preheating your oven to 325 degrees. Then combine all the ingredients in a bowl and mix together with a spoon or your hands until everything is evenly distributed and you are left with something that resembles oatmeal cookie batter.

Place the batter into a lightly greased or nonstick sprayed 9-inch square cake pan and pat it down until it fills the pan uniformly and smoothly.
granola patted down

Place the pan into the oven and cook at 325 degrees for 20-25 minutes. If it starts to brown around the edges, be sure to take it out.

Allow the granola to cool, remove it from the pan and cut it into squares.
homemade granola bars

This recipe really is so easy and delicious that after you make it once, I am sure that you, much like me, will have found your new favorite snack. Enjoy!
granola bar

Friday, September 7, 2007

Firecracker Shrimp

firecracker shrimp
I’m generally of the opinion that if you cover something in batter and submerge it in boiling oil, it is going to come out better than when it went in. However, this profound logic just doesn’t seem to apply shrimp. Nearly all fried shrimp I have been served have been heavy, greasy and 90% batter. More like shrimp doughnuts… actually, that does sound pretty delicious, but they aren’t!

I think that my disdain is most likely a product of living my entire life in the southwest and as a result, far away from any institution that should have the right to serve what could be quite a delicacy. Unfortunately, growing up, my exposure to seafood was almost exclusively from trips to *shudders* a certain red crustacean chain. It was not until my early twenties (how I miss them) that I would have an opportunity to try fried shrimp as it should be prepared: lightly dredged in flour, coated in panko and fried into a perfect, golden and crispy delight!

These “Firecracker” shrimp are a specialty of Tucson’s Metro Restaurants and are a must-order when visiting any of these establishments. Or you can make the Blackberry Pockets version and enjoy them at your leisure.

This recipe really is excellent and firecracker shrimp are the ultimate hor'dourve! Despite being fried, they aren't that greasy and the shrimp stay firm without getting rubbery.

Recipe:
12 pealed/deveined jumbo (12-16 count) gulf shrimp
1/4 cup flour
2 egges - beaten
3/4 cup panko bread crumbs
12 ounces of peanut oil

Method:
Begin by butterflying the shrimp by pulling a sharp knife along the back of each shrimp from the top to just past the middle of the tail. Cut deeply but not all the way through, so that when laid out, the shrimp resembles a butterfly.
butterfly shrimp

butterflied shrimp

After prepping your shrimp, gather three cake pans or deep paper plates and add the flour to one, the eggs to another, the panko to the last and set up your work area with shrimp, flour, eggs and panko in an assembly line fashion.
batter


Now pour 1/4 inch of peanut oil into a frying pan and heat on high until it reaches 350 degrees Fahrenheit or you can just sprinkle some panko into the oil and if it fries (but does not burn) within a couple of seconds, it should be ready.

Now coat each shrimp in a light layer of flour (which will allow the eggs to stick), then toss in the eggs (wich will allow the panko to stick), and then, allowing any excess egg to drip off, lightly coat the shrimp in the panko. The key is to make sure that each layer of the batter is coated on as lightly as possible so that each bite is crispy and not doughy. I would recommend that you do this step in batches of four and then move on to the next step of frying and then return and do another batch of four; if the shrimp sit in the batter for too long, they get kind of mushy and do not crisp up as nicely when fried.

When your first batch of shrimp has been completely battered, place them in the oil on their sides and fry for about a minute, flip and the fry for another minute on the other side. If you need to, you can set them up on the butterflied end to crisp up any batter in the middle of the shrimp that may have not gotten cooked.

Place on a cooling rack over a plate and immediately season with salt and cracked pepper. After you have completed all batches, serve them to your sure-to-be-salivating guests or just gobble them up greedily yourself! I think they go fantastic with a little bit of sriracha chili sauce!

firecracker shrimp

Tuesday, August 21, 2007

A Glorious Bourguignon of Beans

beans bourguignon close

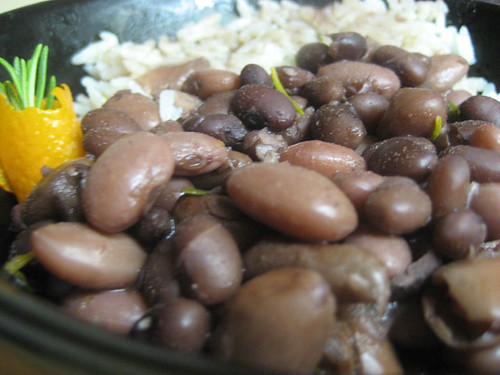
There are few things as comforting as a warm bowl of soupy beans.
Whether they are red, black, pink or pinto, a good bowl of beans never fails to satisfy.

As a child, I would always help my dad to make the famous family secret beans recipe. Made with a blend of pinto and pequiño beans, hamhock and garlic, and a special mix of spices, eating these beans was truly a transcendent experience. It is a recipe that simply must be shared... but not today.

No, I’m afraid that for the time being the family secret, which must be passed on to a male heir, is safe. However, I do have another recipe for you. It’s one that I developed and it is, of course, a winner!

When making beans recently, I realized there are many parallels between the creation of a batch of fine beans and beef stew. Like boiling and uh long cooking times… I think I made them both on Sundays. In any case, I was inspired to combine the two recipes into one glorious bourguignon of beans!

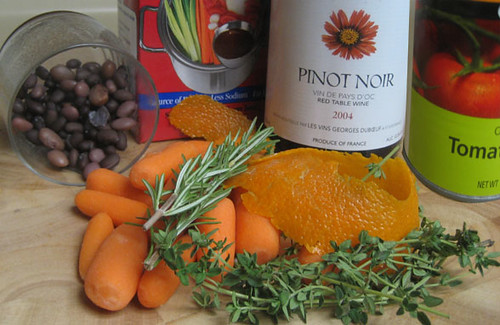
Beans Bourguignon Recipe
1 cup pinto beans
1 cup black beans

1 cup of Pinot Noir
1 15 oz can of tomato sauce
1 tablespoons of fresh rosemary
2 teaspoons of garlic
1 small yellow onion – diced
a strip of orange peel
1 teaspoon of salt + more to taste
Pepper to taste

bean fixin's

Method
Begin by thoroughly washing beans in a colander and removing any deformed and half-beans as well as any errant debris you may find. When the beans are washed, place them in a large pot and soak them over night.

12-24 hours later…
Drain the beans, return them to your large stock, and fill the pot with enough water to cover the beans by 2 inches.

Bring the pot to a boil and then reduce the heat until the water is at a simmer. Allow the beans to cook through until they are soft but just slightly al dente. Depending on the hardness of your water, this can take an hour or two (or looooonger).

When the beans are ready, drain the liquid, preserving 1 cup of the broth.

Return the cup of preserved broth to the beans, add the wine, tomato sauce, rosemary, garlic, onion, orange peel and salt.

Note: when making beans, it is important to always add the salt to the beans during the final stage of cooking. Adding it too early will make the water too saline for the beans to get soft :(


Mix all of the ingredients in with the beans until everything is evenly incorporated and return the pot to heat until it reaches a simmer. Allow to cook for another hour and bon apetito!

beans bourguignon

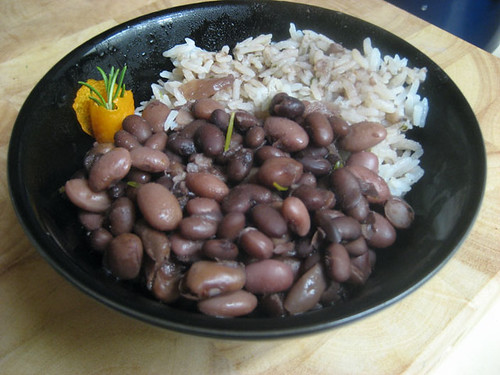
I think this is a fun, experimental recipe and I’m pleased to be able to share it. I also think it makes a fine beef stew replacement for my vegetarian readers. The richness and bold flavors of a bourguignon without the burden of flesh!

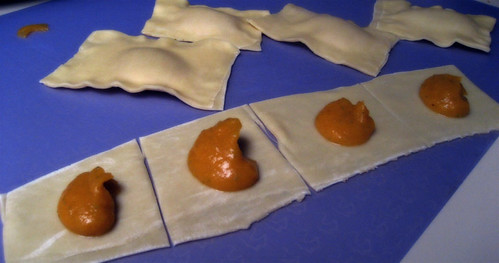
P.S. You might have noticed the carrots in the assembly picture above. I did add carrots to the mix initially but I didn't like the flavor combination so I removed them and consequently omitted them from the final recipe. And now you know.